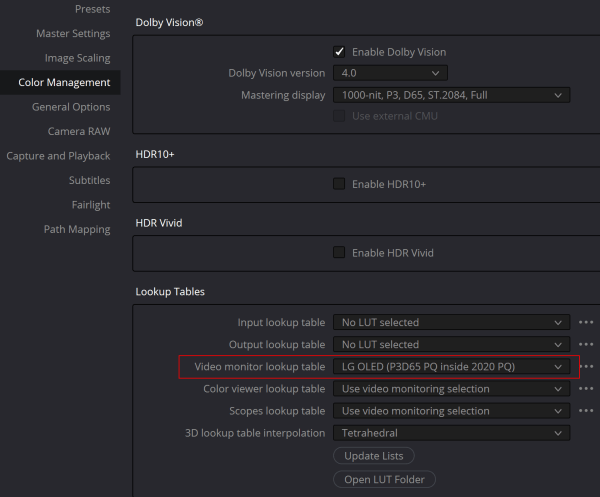
The clip incorporates many of the techniques discussed in our Monster guide - the most comprehensive and up-to-date free resource on the Internet for HDR10 workflows in DaVinci Resolve Studio 18 that shows how to use false color to nail exposure every time; how to use HSL to selectively target problematic areas for the best... Continue Reading →
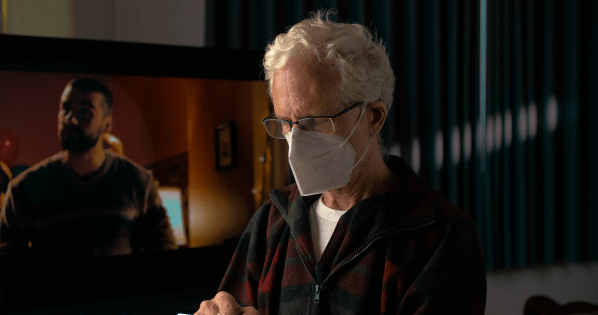
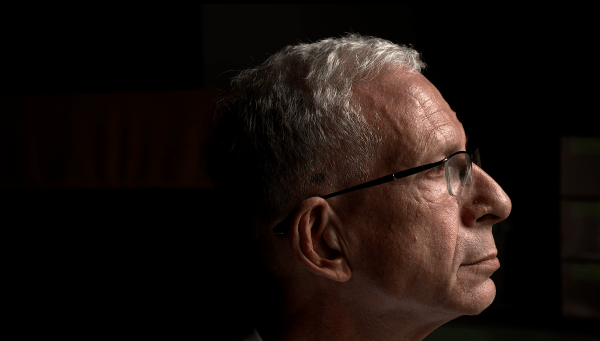
Anna
Don't let the thumbnail deceive you - you can see our bouncy gimbal work in the video. This was only the second time we’ve bothered to calibrate the sensor before a shoot. Up next - trying to figure out a workable follow focus solution for the set of Meike lenses. https://youtu.be/xKzpW0ctQdw
Learn HDR & DV From Senior Colorist Cullen Kelly
Cullen Kelly will be hosting a free training session with Blackmagic Design entitled‘Exploring HDR & Dolby Vision with DaVinci Resolve’Aug 18, 2022 10:00 AMPacific Time (US and Canada)This “ watch & learn” session will teach you how to create and deliver a finished Dolby Vision Master from Resolve 18! Register now at https://us02web.zoom.us/webinar/register/WN_Q6k-gU7MSjm-woSNvoXmEQ Agenda items... Continue Reading →
Create Color Separation & Textural Depth in DR18
Note: The video should be watched in a pitch-dark room. HDR is supposed to be graded in an environment with ambient lighting at 5 nits, which might help to explain why so many complain about HDR being so dark. Unlike SDR, the PQ curve is absolute, meaning that, unlike SDR, the image can't be made... Continue Reading →
RED Komodo at ISO 250
Because of its higher contrast, noise is much more visible in HDR - a fact ignored by camera reviewers - and what may be acceptable in SDR might very well turn out to be unsatisfactory when mastering in PQ ST 2084. CVP shoots their B-roll with the Komodo set to ISO 250 for the cleanest... Continue Reading →
More Komodo Footage
https://youtu.be/XjzeBIt9gLo The video is best watched on an OLED TV. It was shot at 6K 2.4:1, 50 FPS in R3D LQ. RED raw files are a joy to grade, the color and texture of the image are like nothing we've ever experienced. The Canon 35mm macro is a crispy little bugger with pleasant enough rendition... Continue Reading →
RED Komodo First Sample Footage! (re-upload)
The footage was massively overexposed and white balance was off by several thousand degrees Kelvin. Still figuring things out... hehe https://youtu.be/eM9j2VxjBpk
Our First RAW Gimbal Shots
This is our very first video shot on a gimbal with ProRes RAW. To mount the Ninja V on the DJI RS 2, we used a SmallRig monitor mount. With the Sony 50mm f/1.2 GM, it's a fairly hefty combo. Graded in Final Cut Pro. https://youtu.be/AOOrn2IwHWk
P3D65 ST.2084 (HDR) Monitoring for LG OLEDs (WRGB)
In the past, we've written about LG's hidden menu that allows users to change the working color space, but frustratingly, the P3-D65 option is cosmetic only. The following is word-for-word from Ted Aspiotis' post over at Lift Gamma Gain, where he explains how to set up your LG TV for P3-D65: LG WRGB OLEDs work... Continue Reading →
RED Komodo Post Workflow Added to Monster Guide
The past couple of months have seen extensive updates to our Monster Guide and we're proud to say we've achieved our goal of making the most comprehensive and up-to-date manual covering the HDR10 workflow anywhere on the Web. And today it just got even better with the addition of the RED KOMODO post workflow. REDCODE... Continue Reading →
HEVC High Bitrate vs. ProRes 4444 XQ (HDR)
In this test, we compare HEVC bitrate 39,000 kbps (which ended up being 22.6 Mb/s), HEVC bitrate 80,000 kbps (which turned out to be 46.3Mb/s overall bitrate ) and ProRes 4444 XQ. To compare the clips yourself, open up the videos in three different tabs of your browser. As of today, we officially bid farewell... Continue Reading →
HEVC 10-bit 4:2:2 vs. ProRes 4444 XQ to YT
If you don't mind the ginormous file sizes and waiting longer for YouTube to finish uploading and processing your video, ProRes 4444 XQ does offer benefits over HEVC 10-bit 4:2:2 (using the standard bitrate for web publishing in Apple Compressor): more detail and improved contrast as well as richer color. In the sample clip, there... Continue Reading →
Create Textural Depth with Depth Map
Grain is one of the key components of the film look but few things are more distracting than seeing clumps of film grain dancing around on the talent's face. One solution is to use the HSL qualifier to isolate skin tones and use the keyer to de-emphasize the grain. An even easier way is to... Continue Reading →
The Ultimate Comparison: ProRes 4444 XQ vs. HEVC 4:2:2 vs. HEVC 4:2:0 (HDR)
In this short clip, we're primarily interested in how Y'CbCr chroma subsampling affects skin tones in HDR video. Y'CbCr results in hue shifts and luminance errors. From our own testing, it appears to make skin tones yellowish-green, darker and oversaturated. HEVC Main 4:2:2 10 is preferable to HEVC 4:2:0. Download the comparison here. If you... Continue Reading →
Thoughts on Nikolaj Pognerebko’s RAW Convertor (Revised!)
https://youtu.be/if7IzD9tl4w Not a few of us have dreamed of being able to work with native ProRes RAW files in DaVinci Resolve, but realistically, it appears as though that’s not on the horizon. We'd been transcoding to ProRes 4444 with variable success for a while when it was announced last year that a Czech filmmaker by... Continue Reading →
Create Textural Depth II
The viewer’s eye can be drawn to the subject in a number of ways. Two of the techniques employed here are color separation, achieved through split-toning, and obscuring the surroundings using a mask and reducing brightness. Another approach is to create textural depth by accentuating the texture in cooler, darker backgrounds while de-emphasizing grain in... Continue Reading →
Projector Central Weighs in on 4:2:0
Over at Projector Central, Michael J. McNamara, former Executive Technology Editor of Popular Photography magazine and a renowned expert on digital capture, storage, and display technologies writes: “Does using 4:2:0 subsampling significantly degrade image quality for movie viewing versus using 4:2:2? Not according to most viewers who've enjoyed any number of 4K UHD SDR and... Continue Reading →
Create Textural Depth!
During an appearance on Cullen Kelly’s Grade School, the brilliant colorist Jill Bogdanowicz revealed a secret to accenting texture without it looking over-processed. While working on Joker, the colorist used Live Grain - which separates out the red, green and blue channels, creating grain that resembles scanned film - to accentuate texture in the cooler,... Continue Reading →
Not A Grade Reveal!
A few caveats: first, the original footage was green and overexposed; secondly, we didn't use the recommended DaVinci Wide Gamut; and lastly, as we do all of our grading before the LUT, the original footage looked nuts when we removed the LUT for the grade reveal, so we normalized it for the video. https://youtu.be/3Bv3RUGbwEc