Garden variety 8-bit SDR TV has a displayed dynamic range of around 32:1, or 5 stops, while HDR has in the neighborhood of 14 stops, which corresponds roughly to the sensitivity of the human eye for a single, or static scene. HDR also has a vastly greater color volume than SDR. Videos uploaded to YouTube in HDR benefit not only from greater contrast, color volume and sharpness, but also suffer from significantly fewer compression artifacts than SDR videos. The absence of unsightly banding artifacts alone should be reason enough for choosing HDR. No one, having seen the HDR version of a video, would prefer the SDR one. Hundreds of different models of mobile phones currently on the market now support HDR. For those of us not shooting Netflix Originals or having our masterpieces of cinematic art screened at international film festivals, YouTube offers the very best platform for exhibiting our work and reaching the widest possible audience. Our hope is that this tutorial will help you to get started uploading HDR videos to YouTube with as little fuss as possible. The following are setup instructions for the a7s III, the Blackmagic Ultrastudio 4K Mini and LG OLED TV, along with guidance on settings for Final Cut Pro and Compressor for the purpose of uploading HDR10 videos to YouTube.
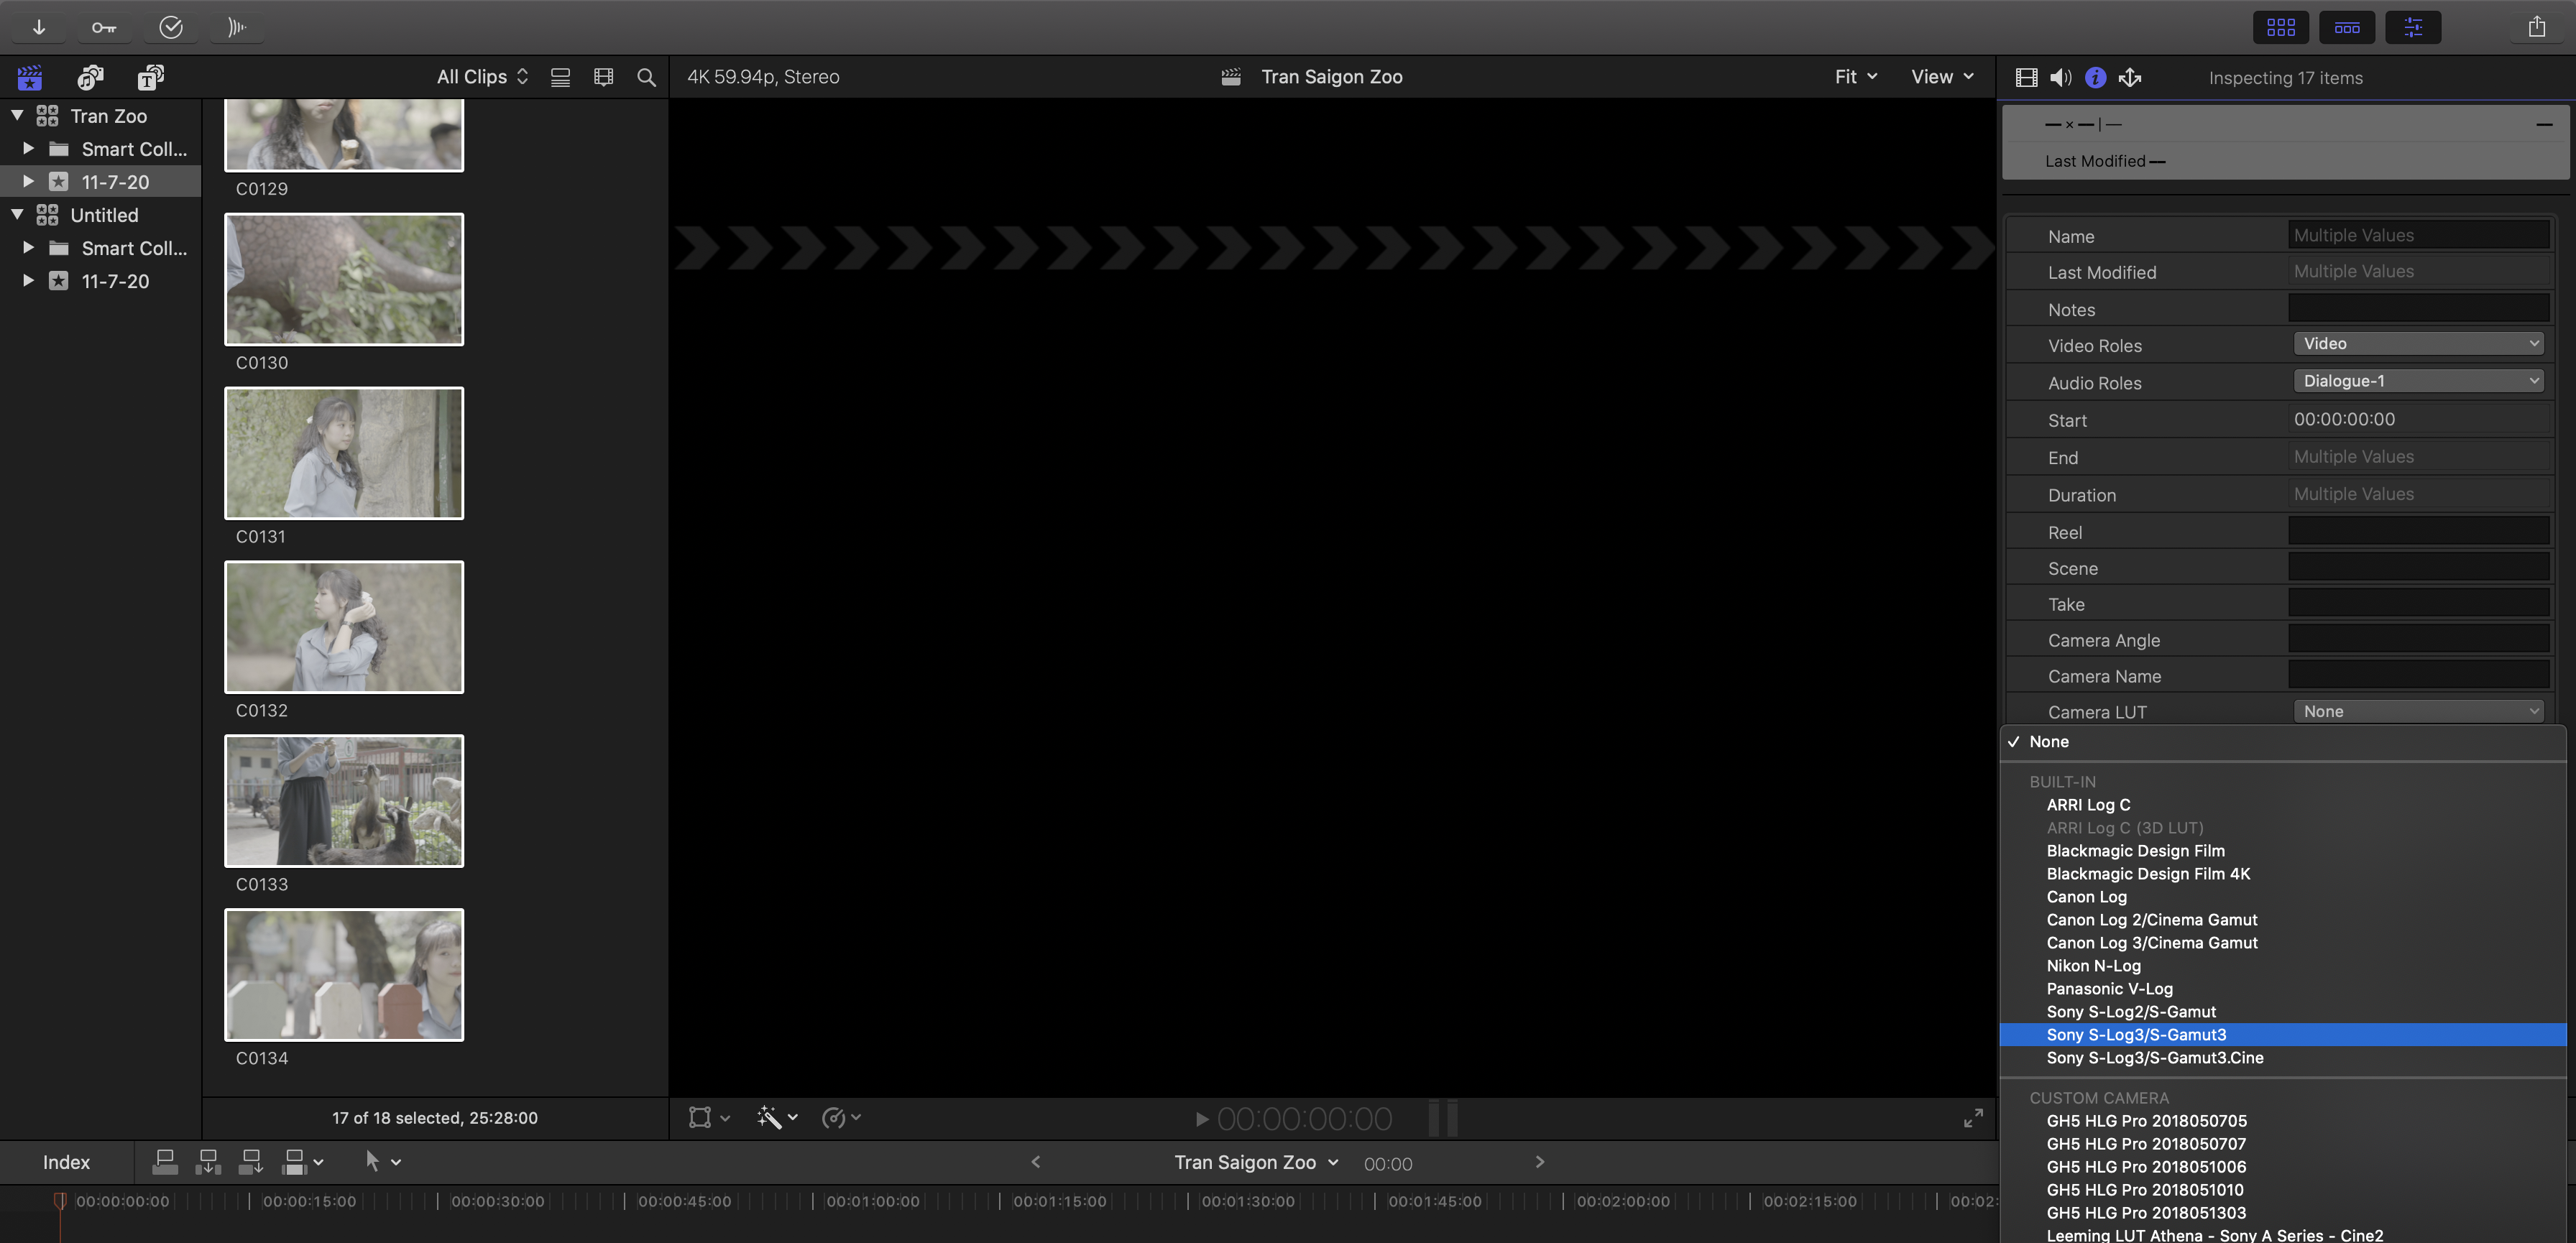
In picture profile, select either S-Gamut3/S-Log3 or S-Gamut3.cine/S-Log3. For what it’s worth, S-Gamut3.cine/S-Log3 is the most common color space used on Sony FX9, F55, FS7, F5 and FX6 Netflix productions (which also use the P3-D65 color space in post-production). S-log3 captures 13 stops of dynamic range, which is comparable to film negatives.
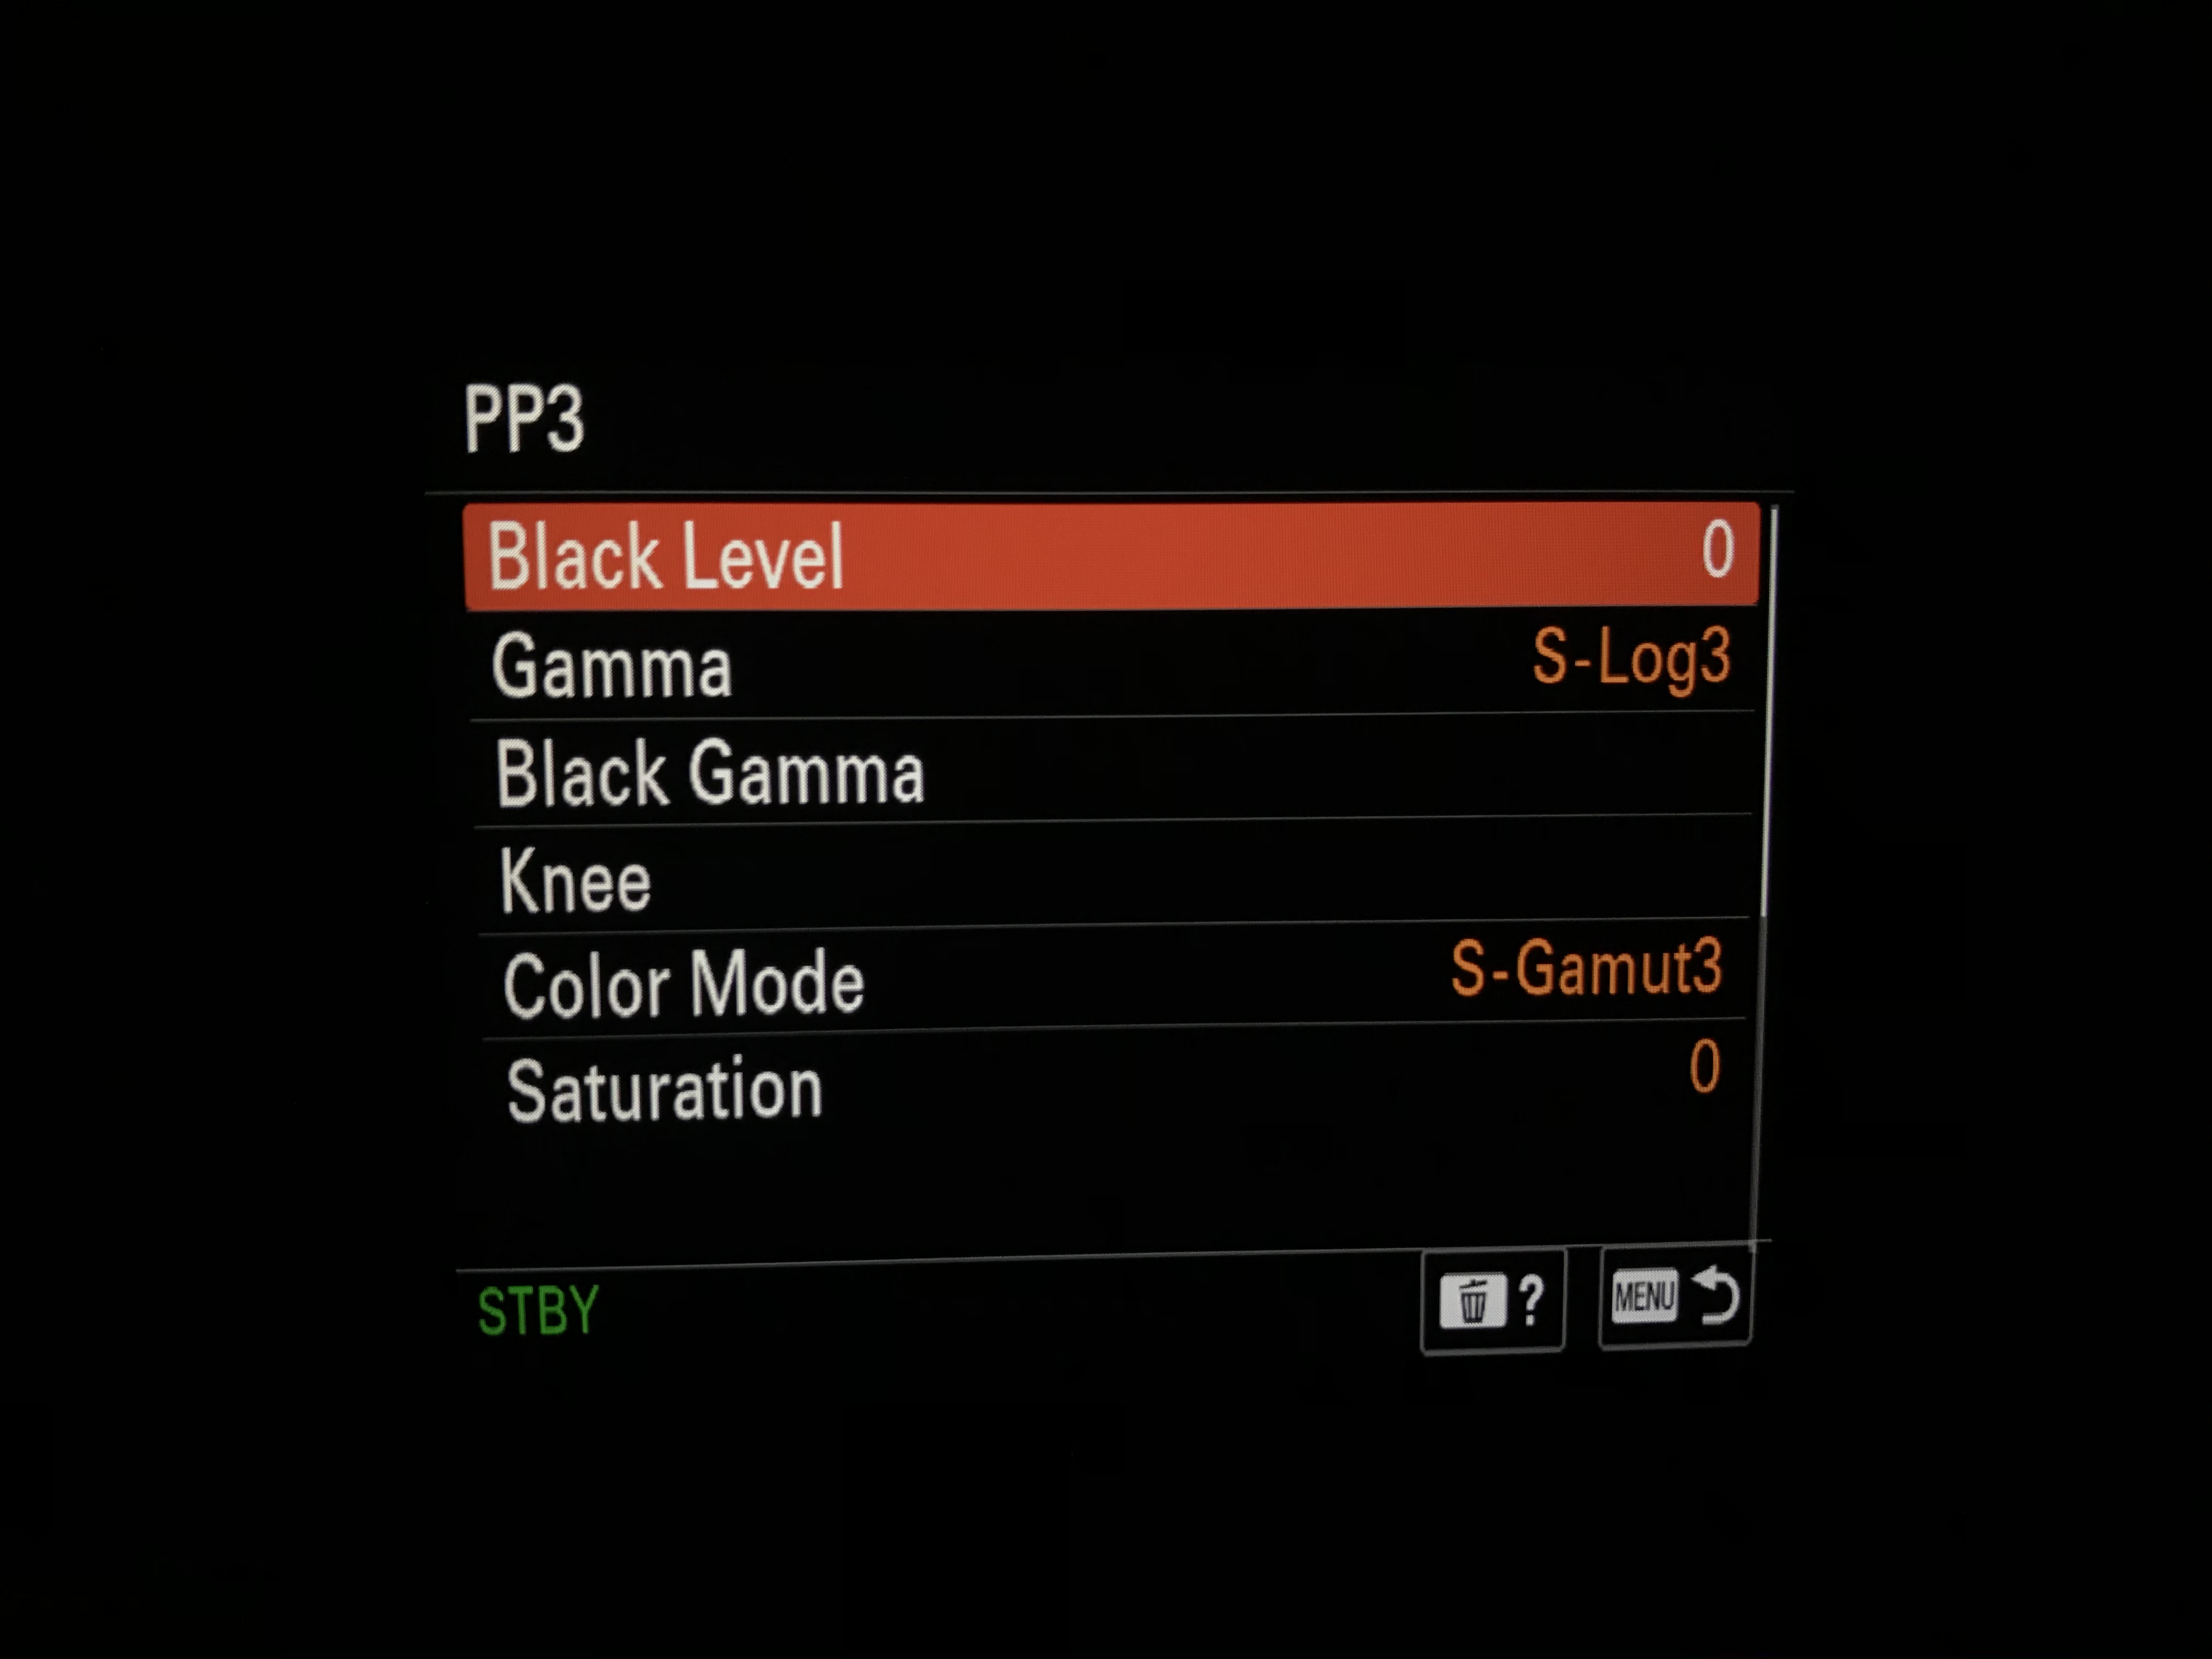
Note: For critical work, we really recommend shooting RAW, not XAVC S-I internal.
In spite of bizarre claims made in some online tutorials suggesting that tone mapping in Final Cut Pro allows for color correction in lieu of a proper external monitor, MacBook Pro and iMac displays may not be used for grading HDR video. Furthermore, it is not advisable to connect either directly to an HDR monitor or television set without an I/O box. Nor should one be relying on a field monitor like the Shogun Inferno for color grading. Focus and resolution should only be judged on a screen that is sufficiently large to allow viewing at 1.5 times picture height. Suitable displays include the Asus ProArt PA32 UC, ProArt PA32 UCX and LG OLED televisions. Apple’s Pro Display XDR is not recommended, as one can pick up as many as three Asus monitors or four 55″ OLED televisions for the cost of one XDR display with stand, nano textured glass and 3-year extended warranty. You might also consider adding a consumer reference display.

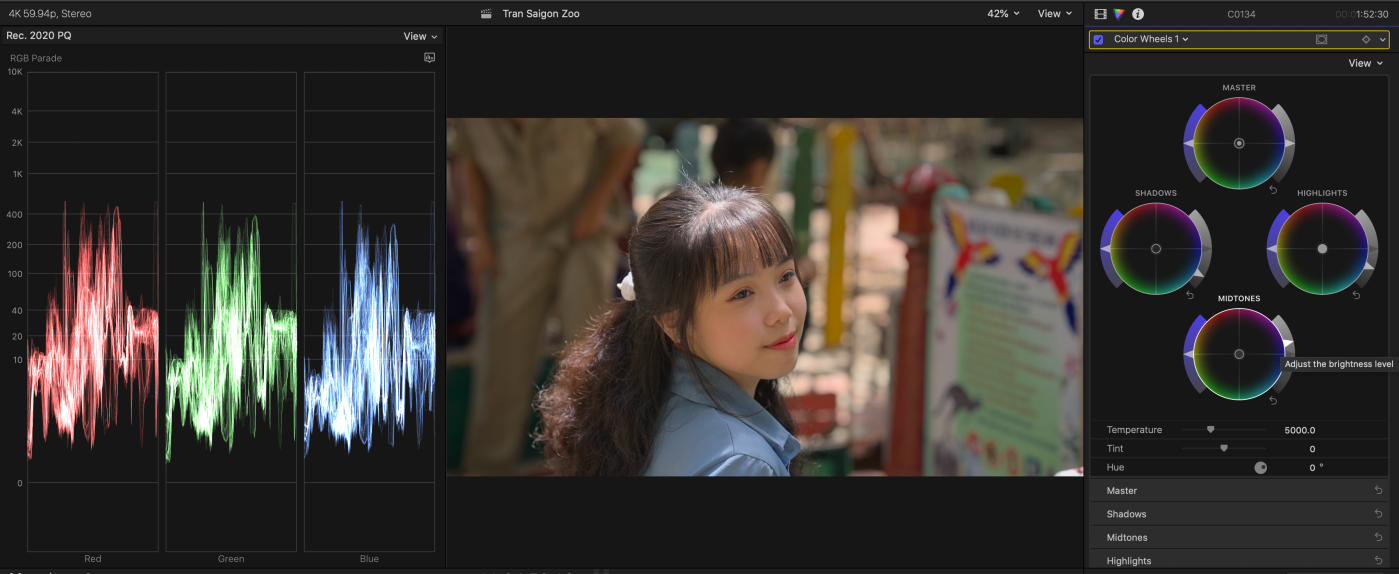
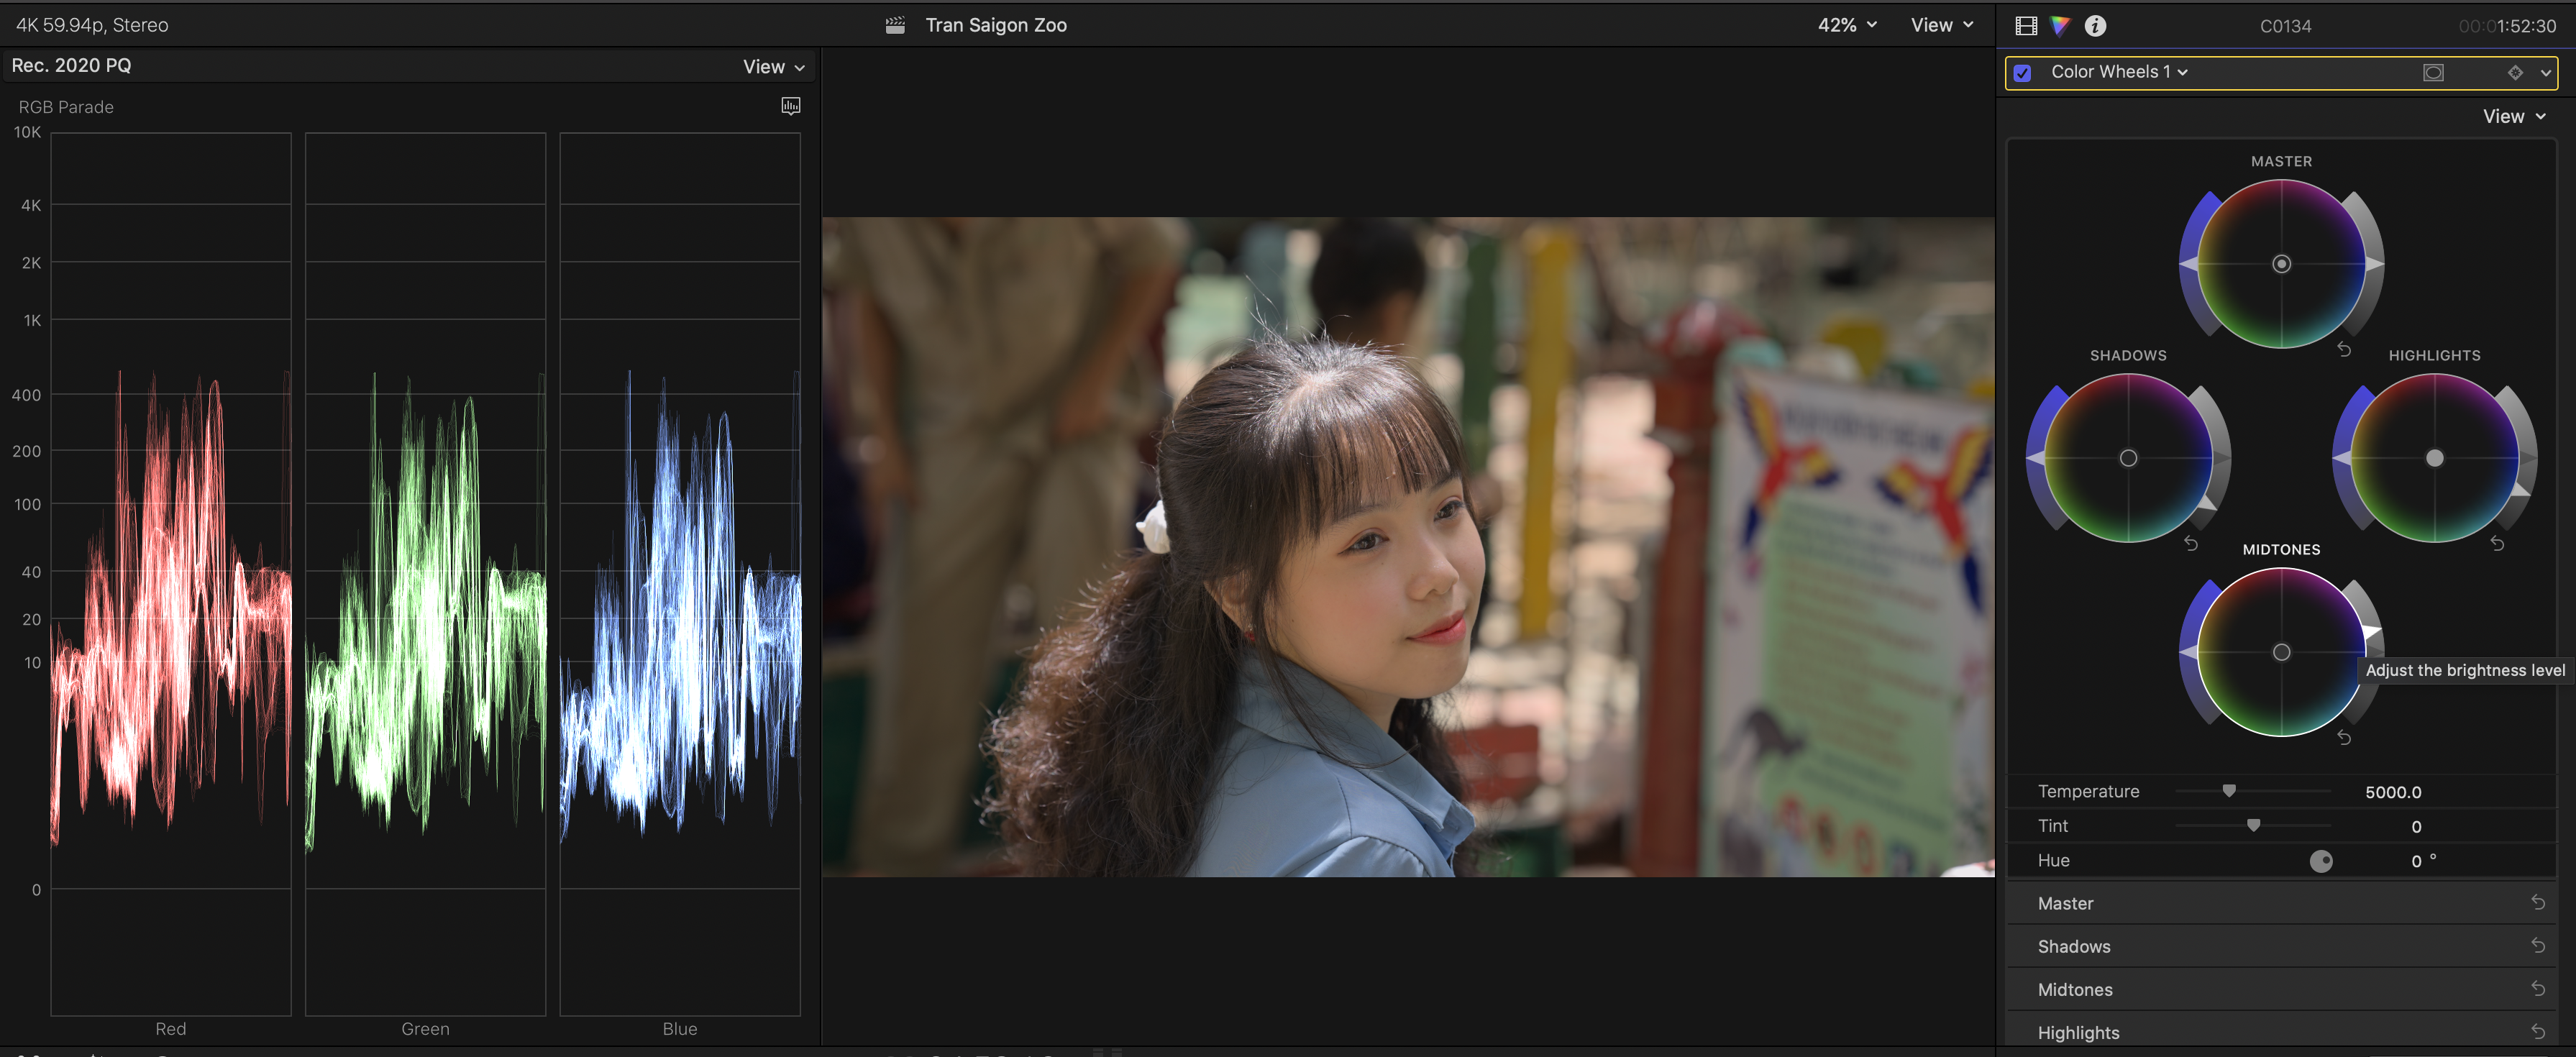
Exercise restraint and resist the temptation to crank everything up to 11 just because you’ve got a wider palette to work with! A little bit goes a long way. Most of the image, from shadows to mid-tones, should still be graded under 100 nits as before. Watch Netflix shows to get acquainted with how colorists deal with the expanded range of brightness: The Spy (2019), The Trial of the Chicago 7 or Altered Carbon are as good a place to start as any. A color correction workflow can be found here.

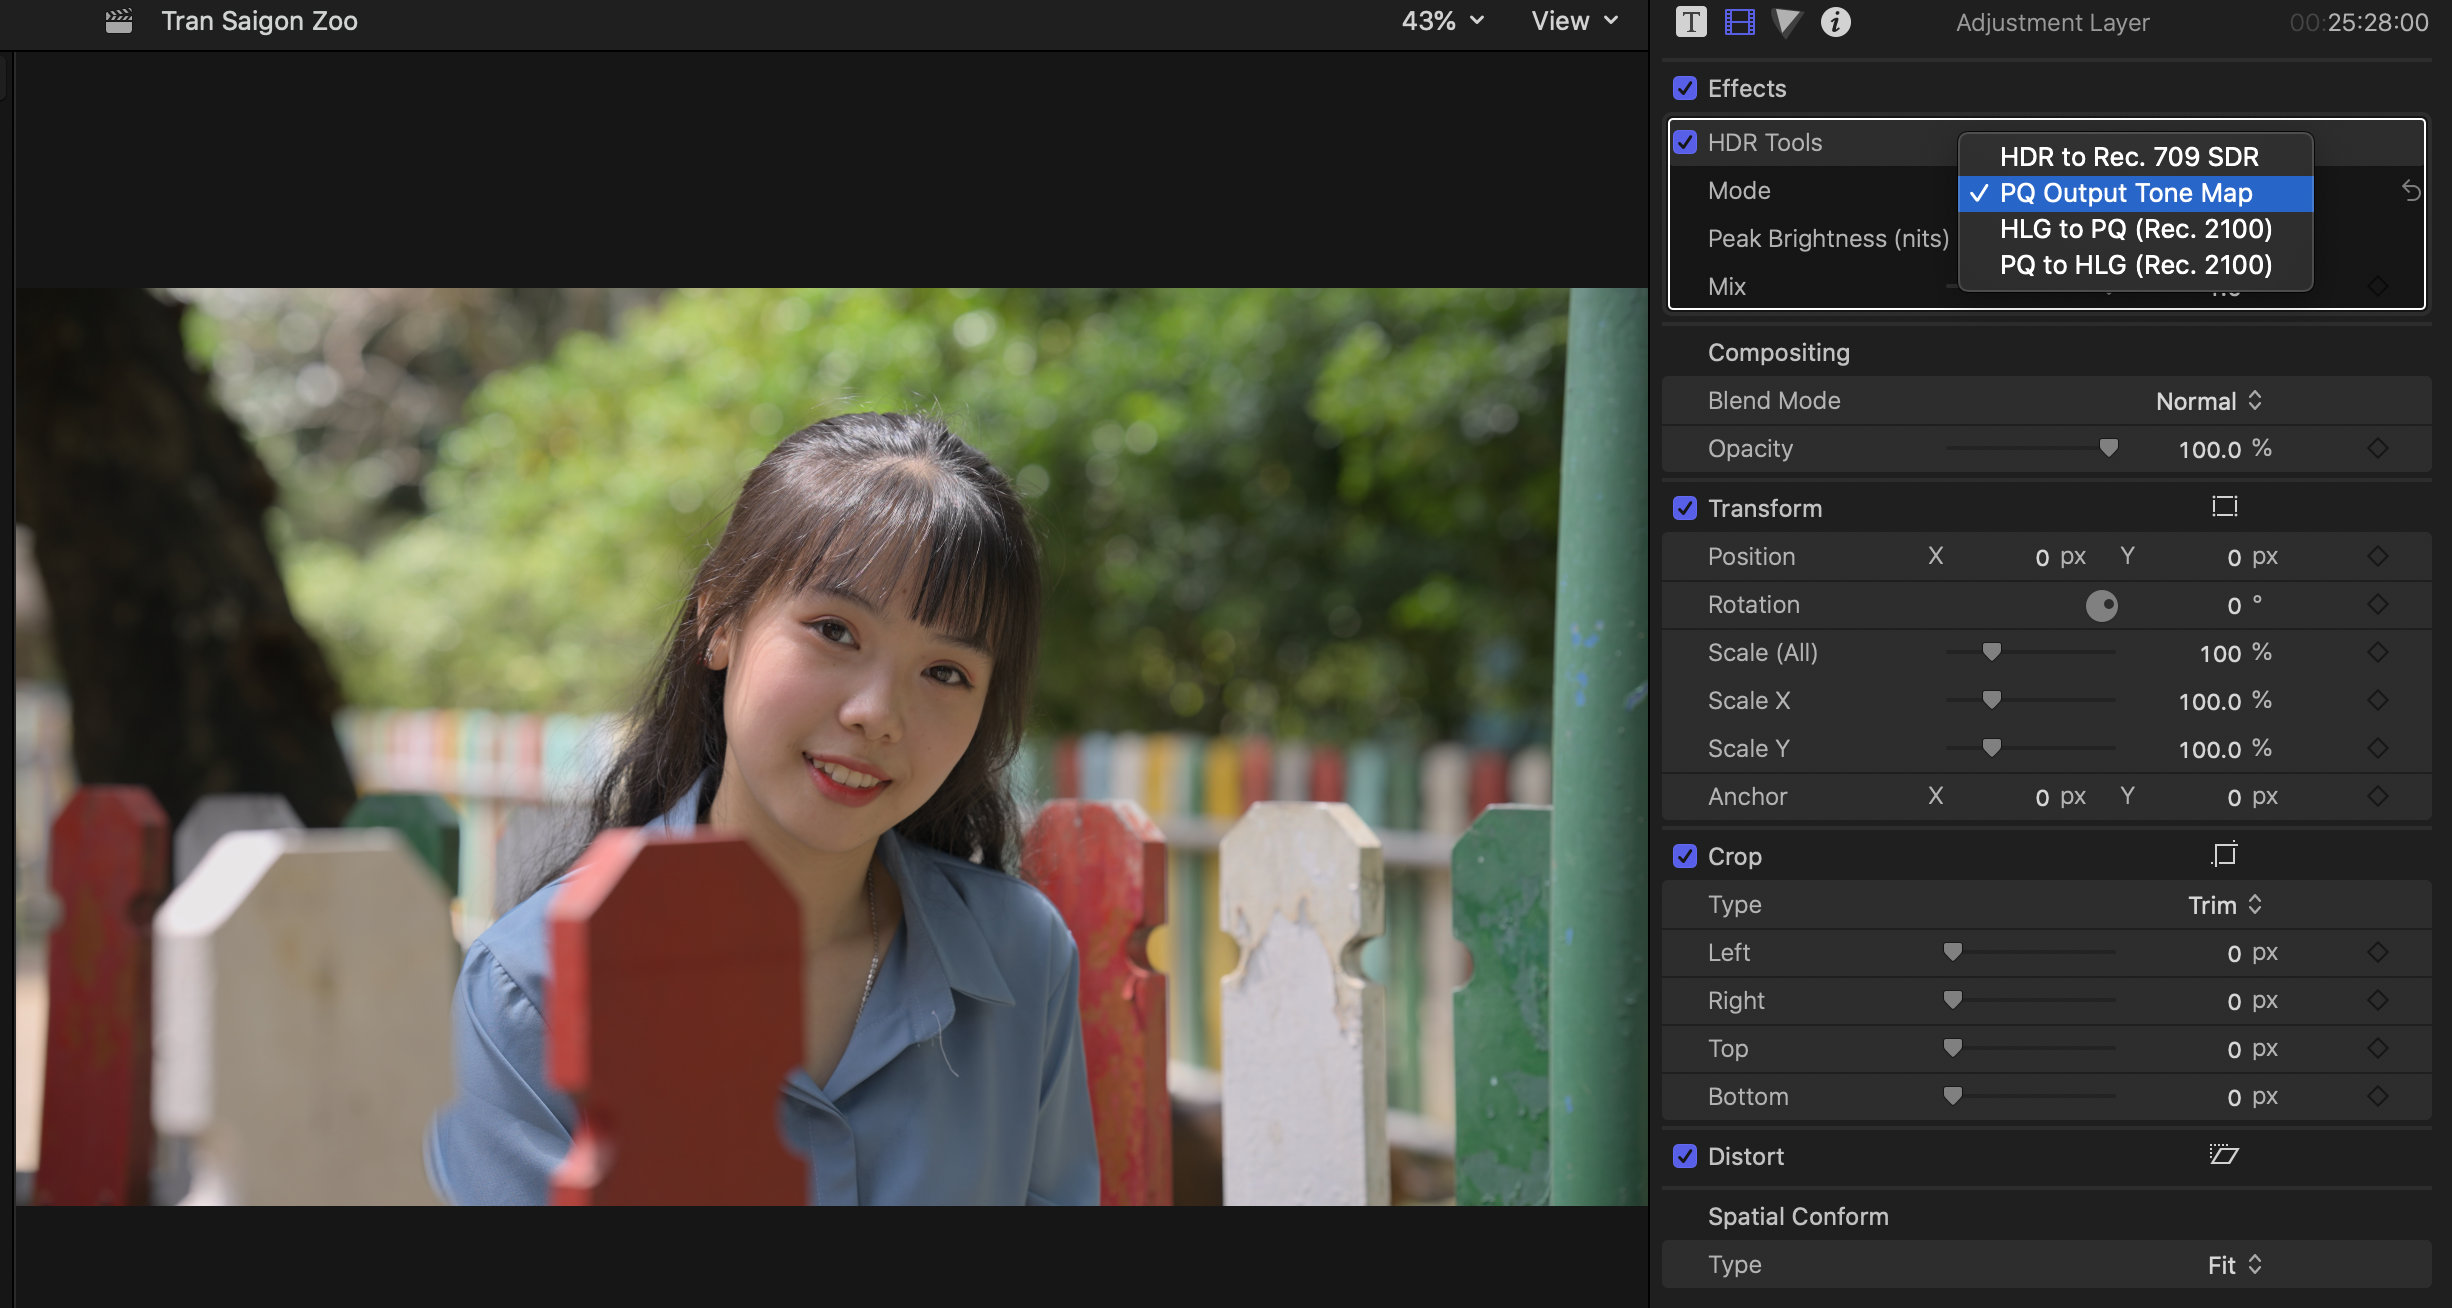
HDR Tools to the adjustment layer. HDR Tools must be applied as the very last effect.
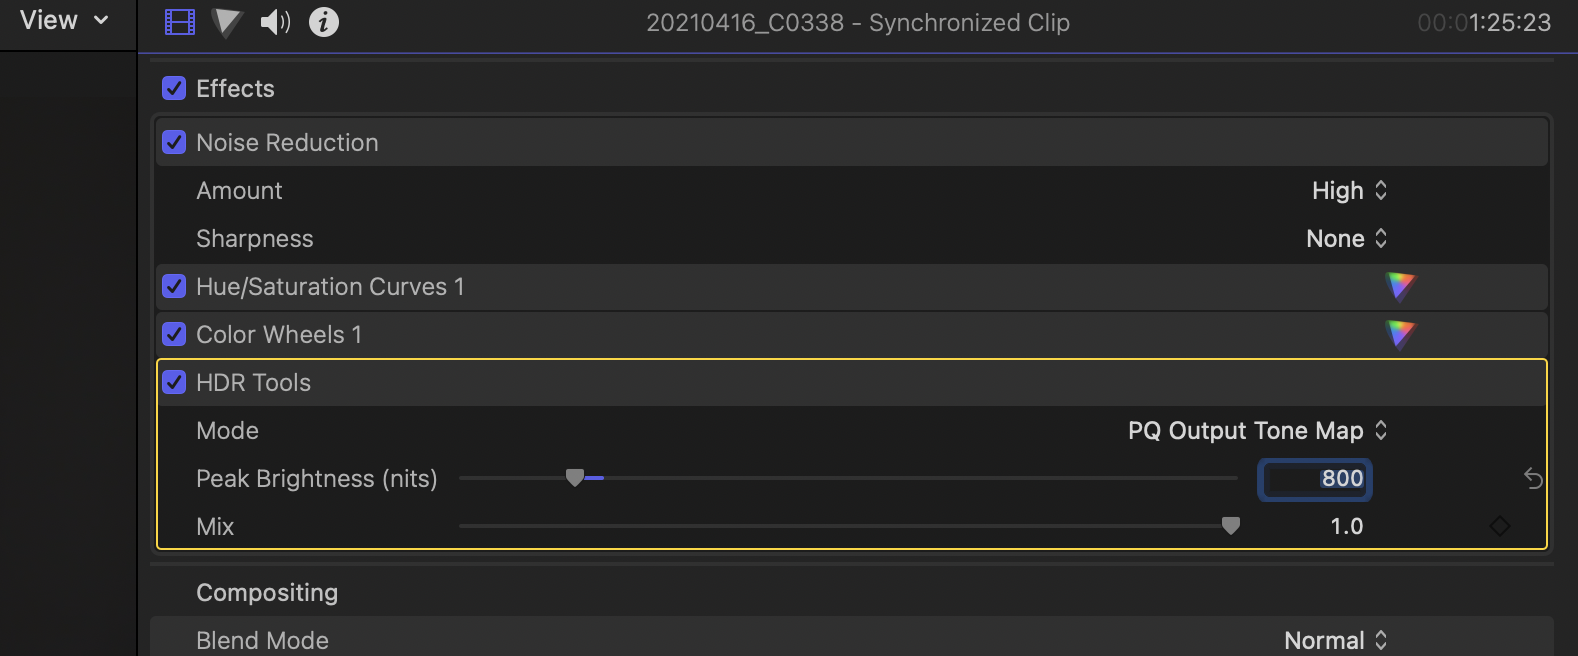
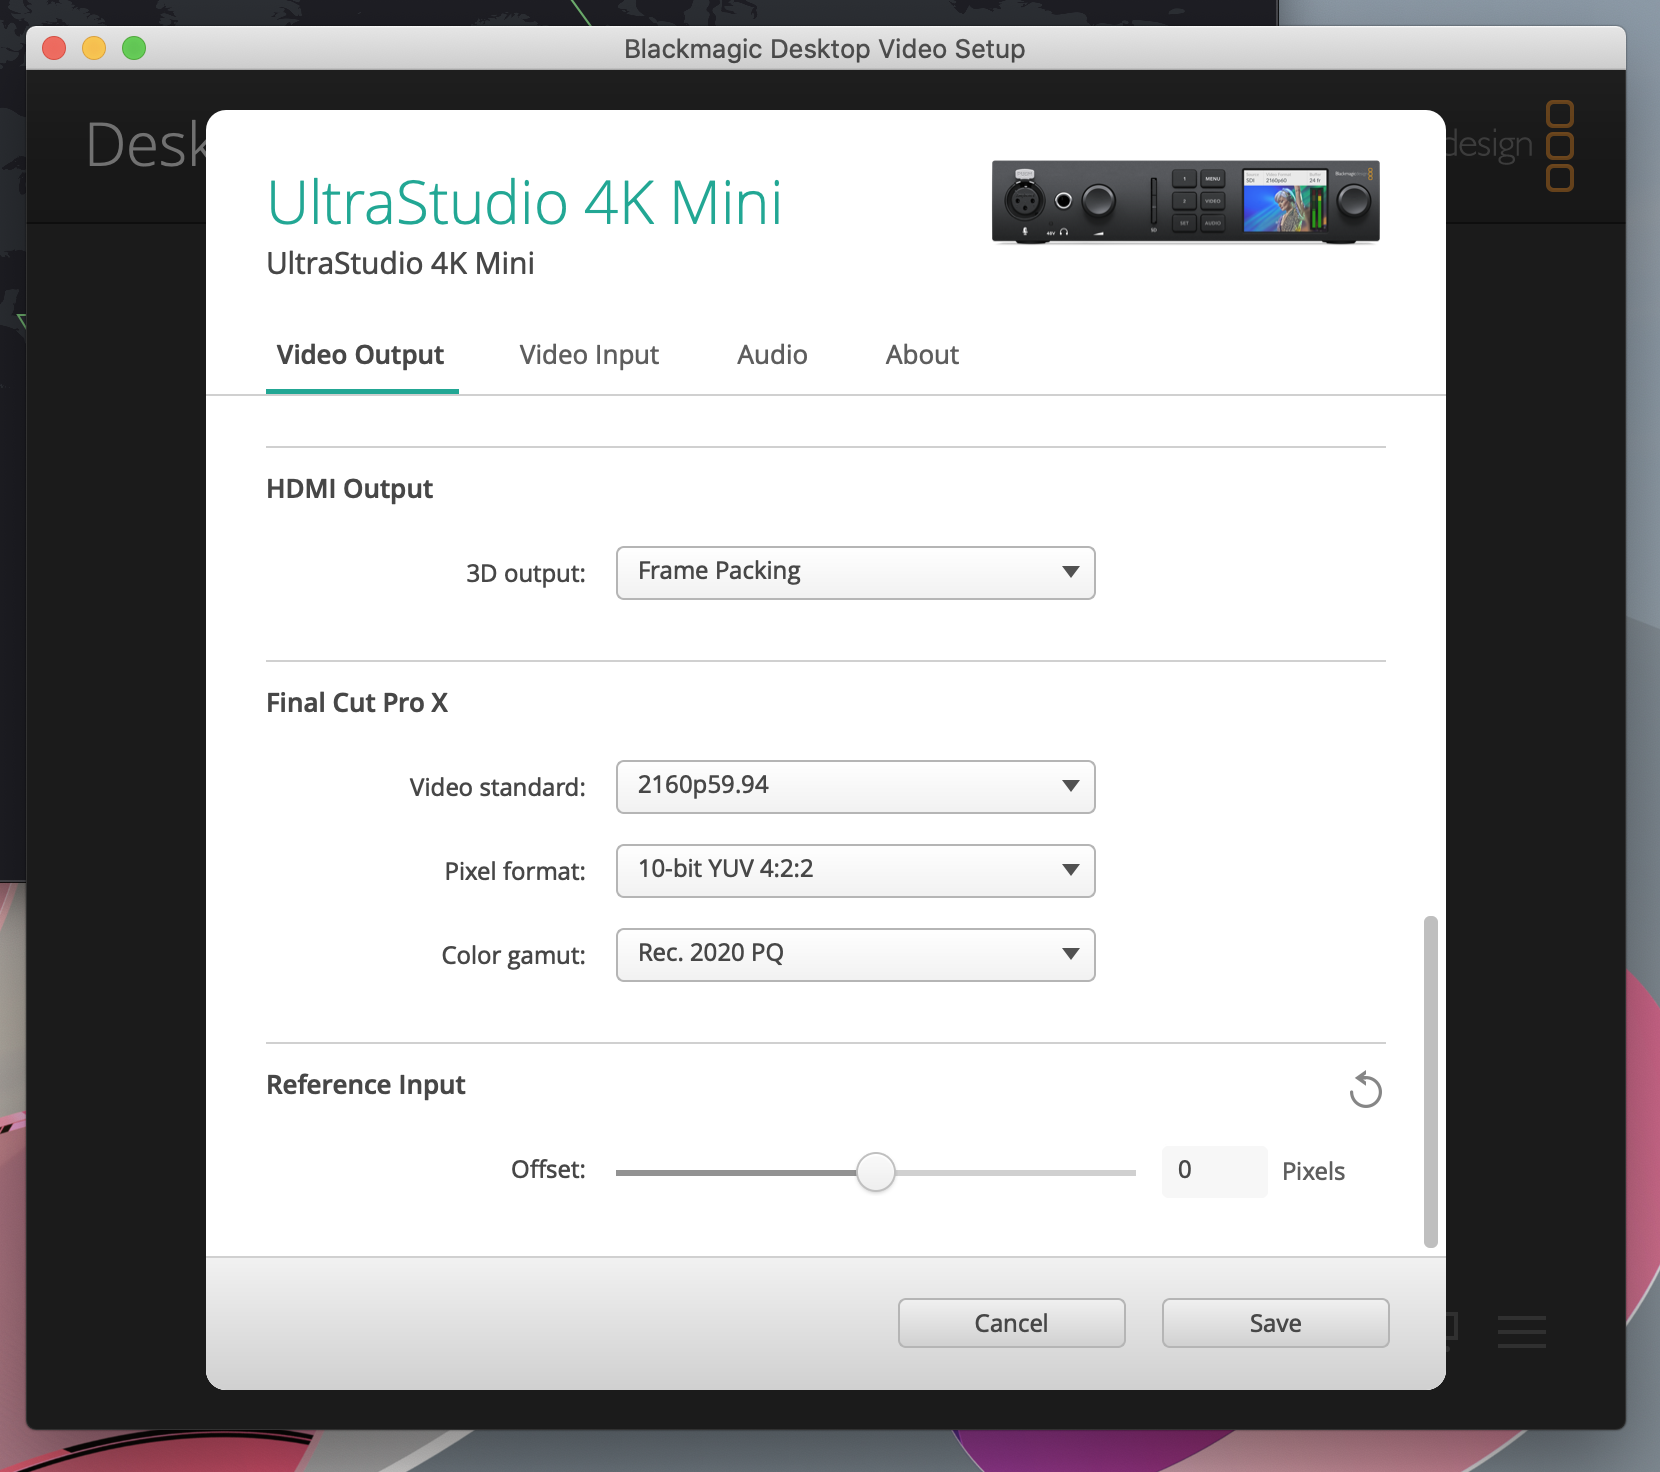
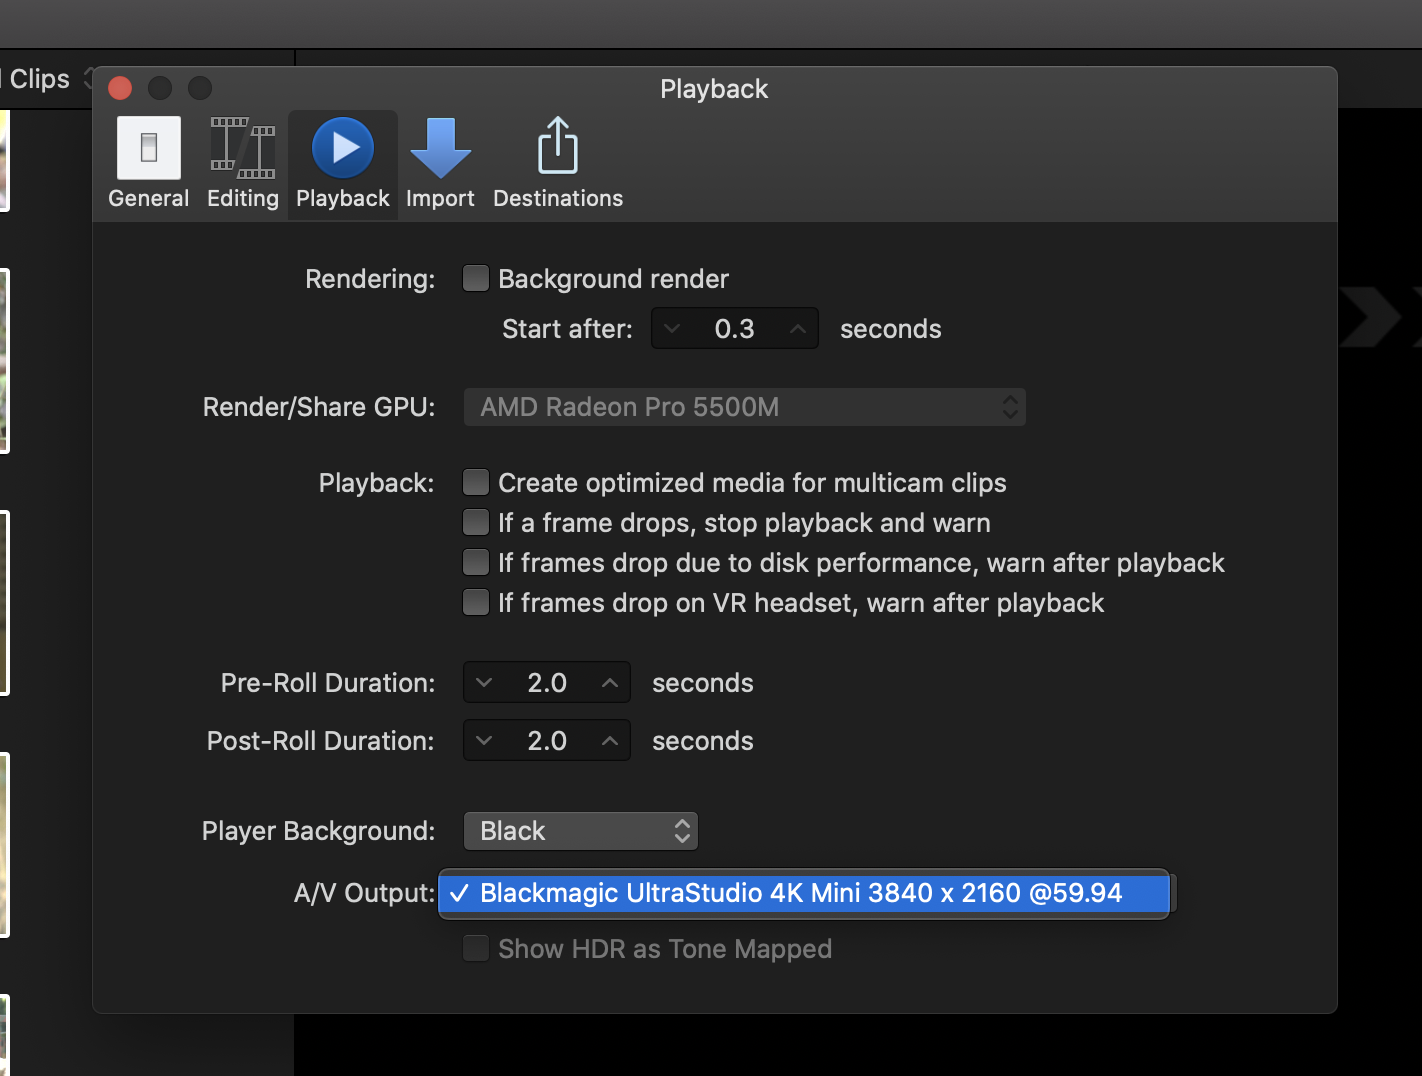
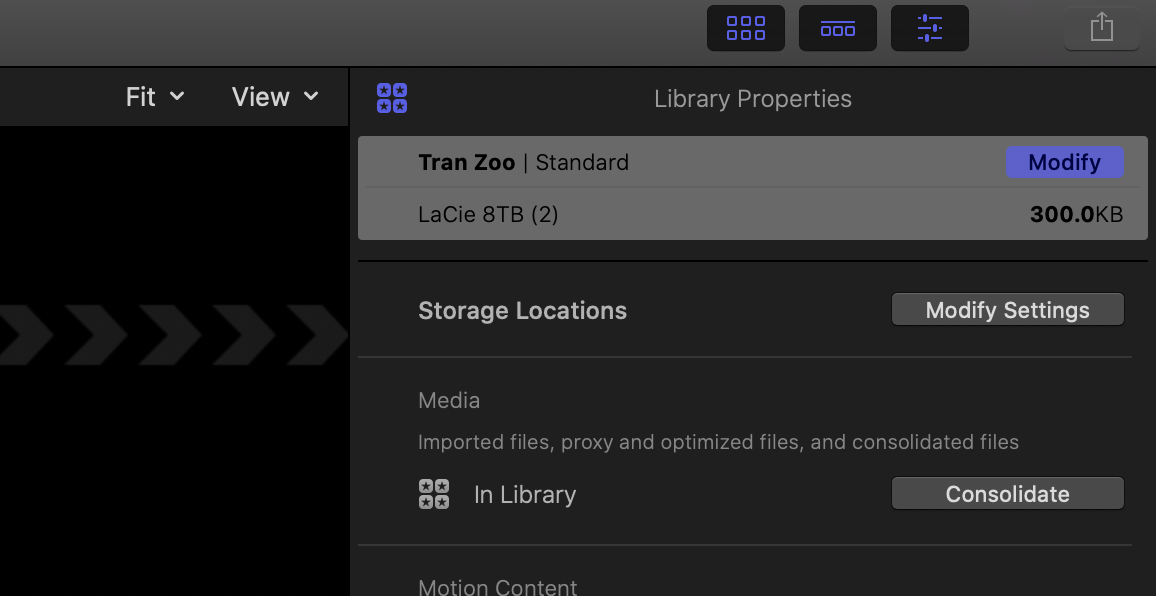
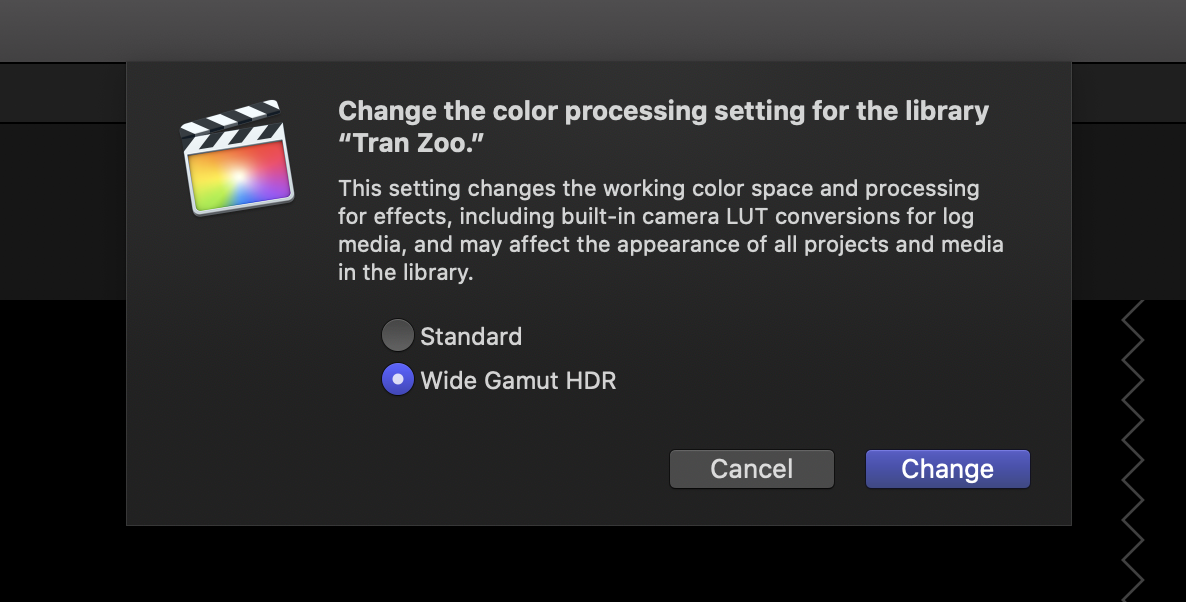
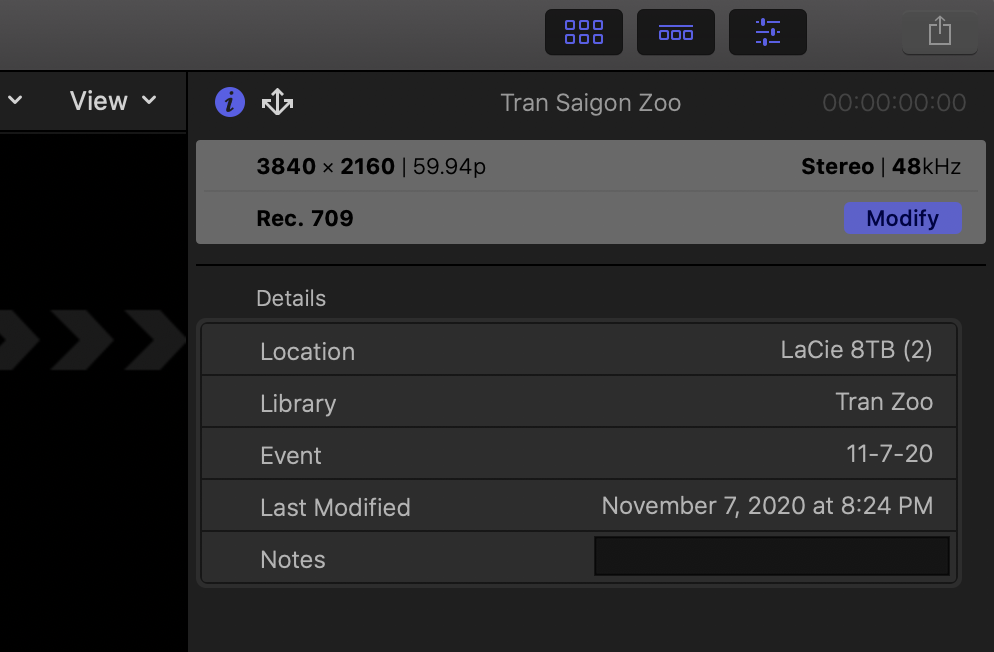
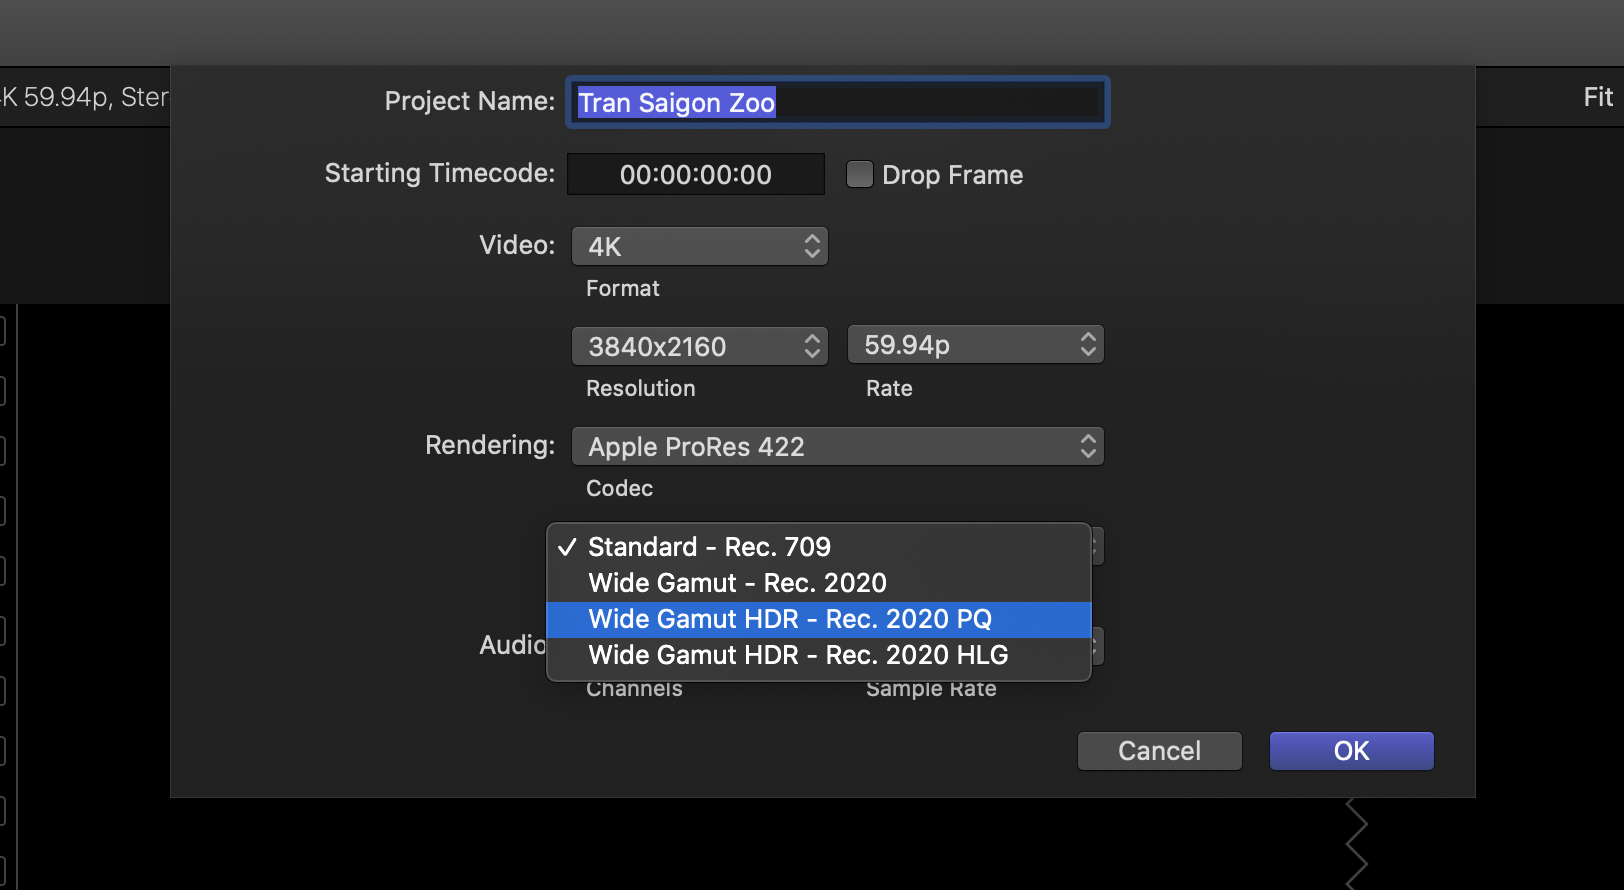
matches the capabilities of the monitor that will be used to play back the project.


I was about to take interest back to photography but your videos make me think about video again!
That’s too awesome! 🔥
thank you for sharing !!
Glad it was helpful!
Thanks a lot for this awesome article with a ton of useful info, Jon. After watching your latest video on YT I`m hooked on this HDR thing. I can see myself spending quite some time to figure everything out. Again, thanks for sharing this with us.
Thank you so much for this awesome post.
Recently started learning HDR Grading.
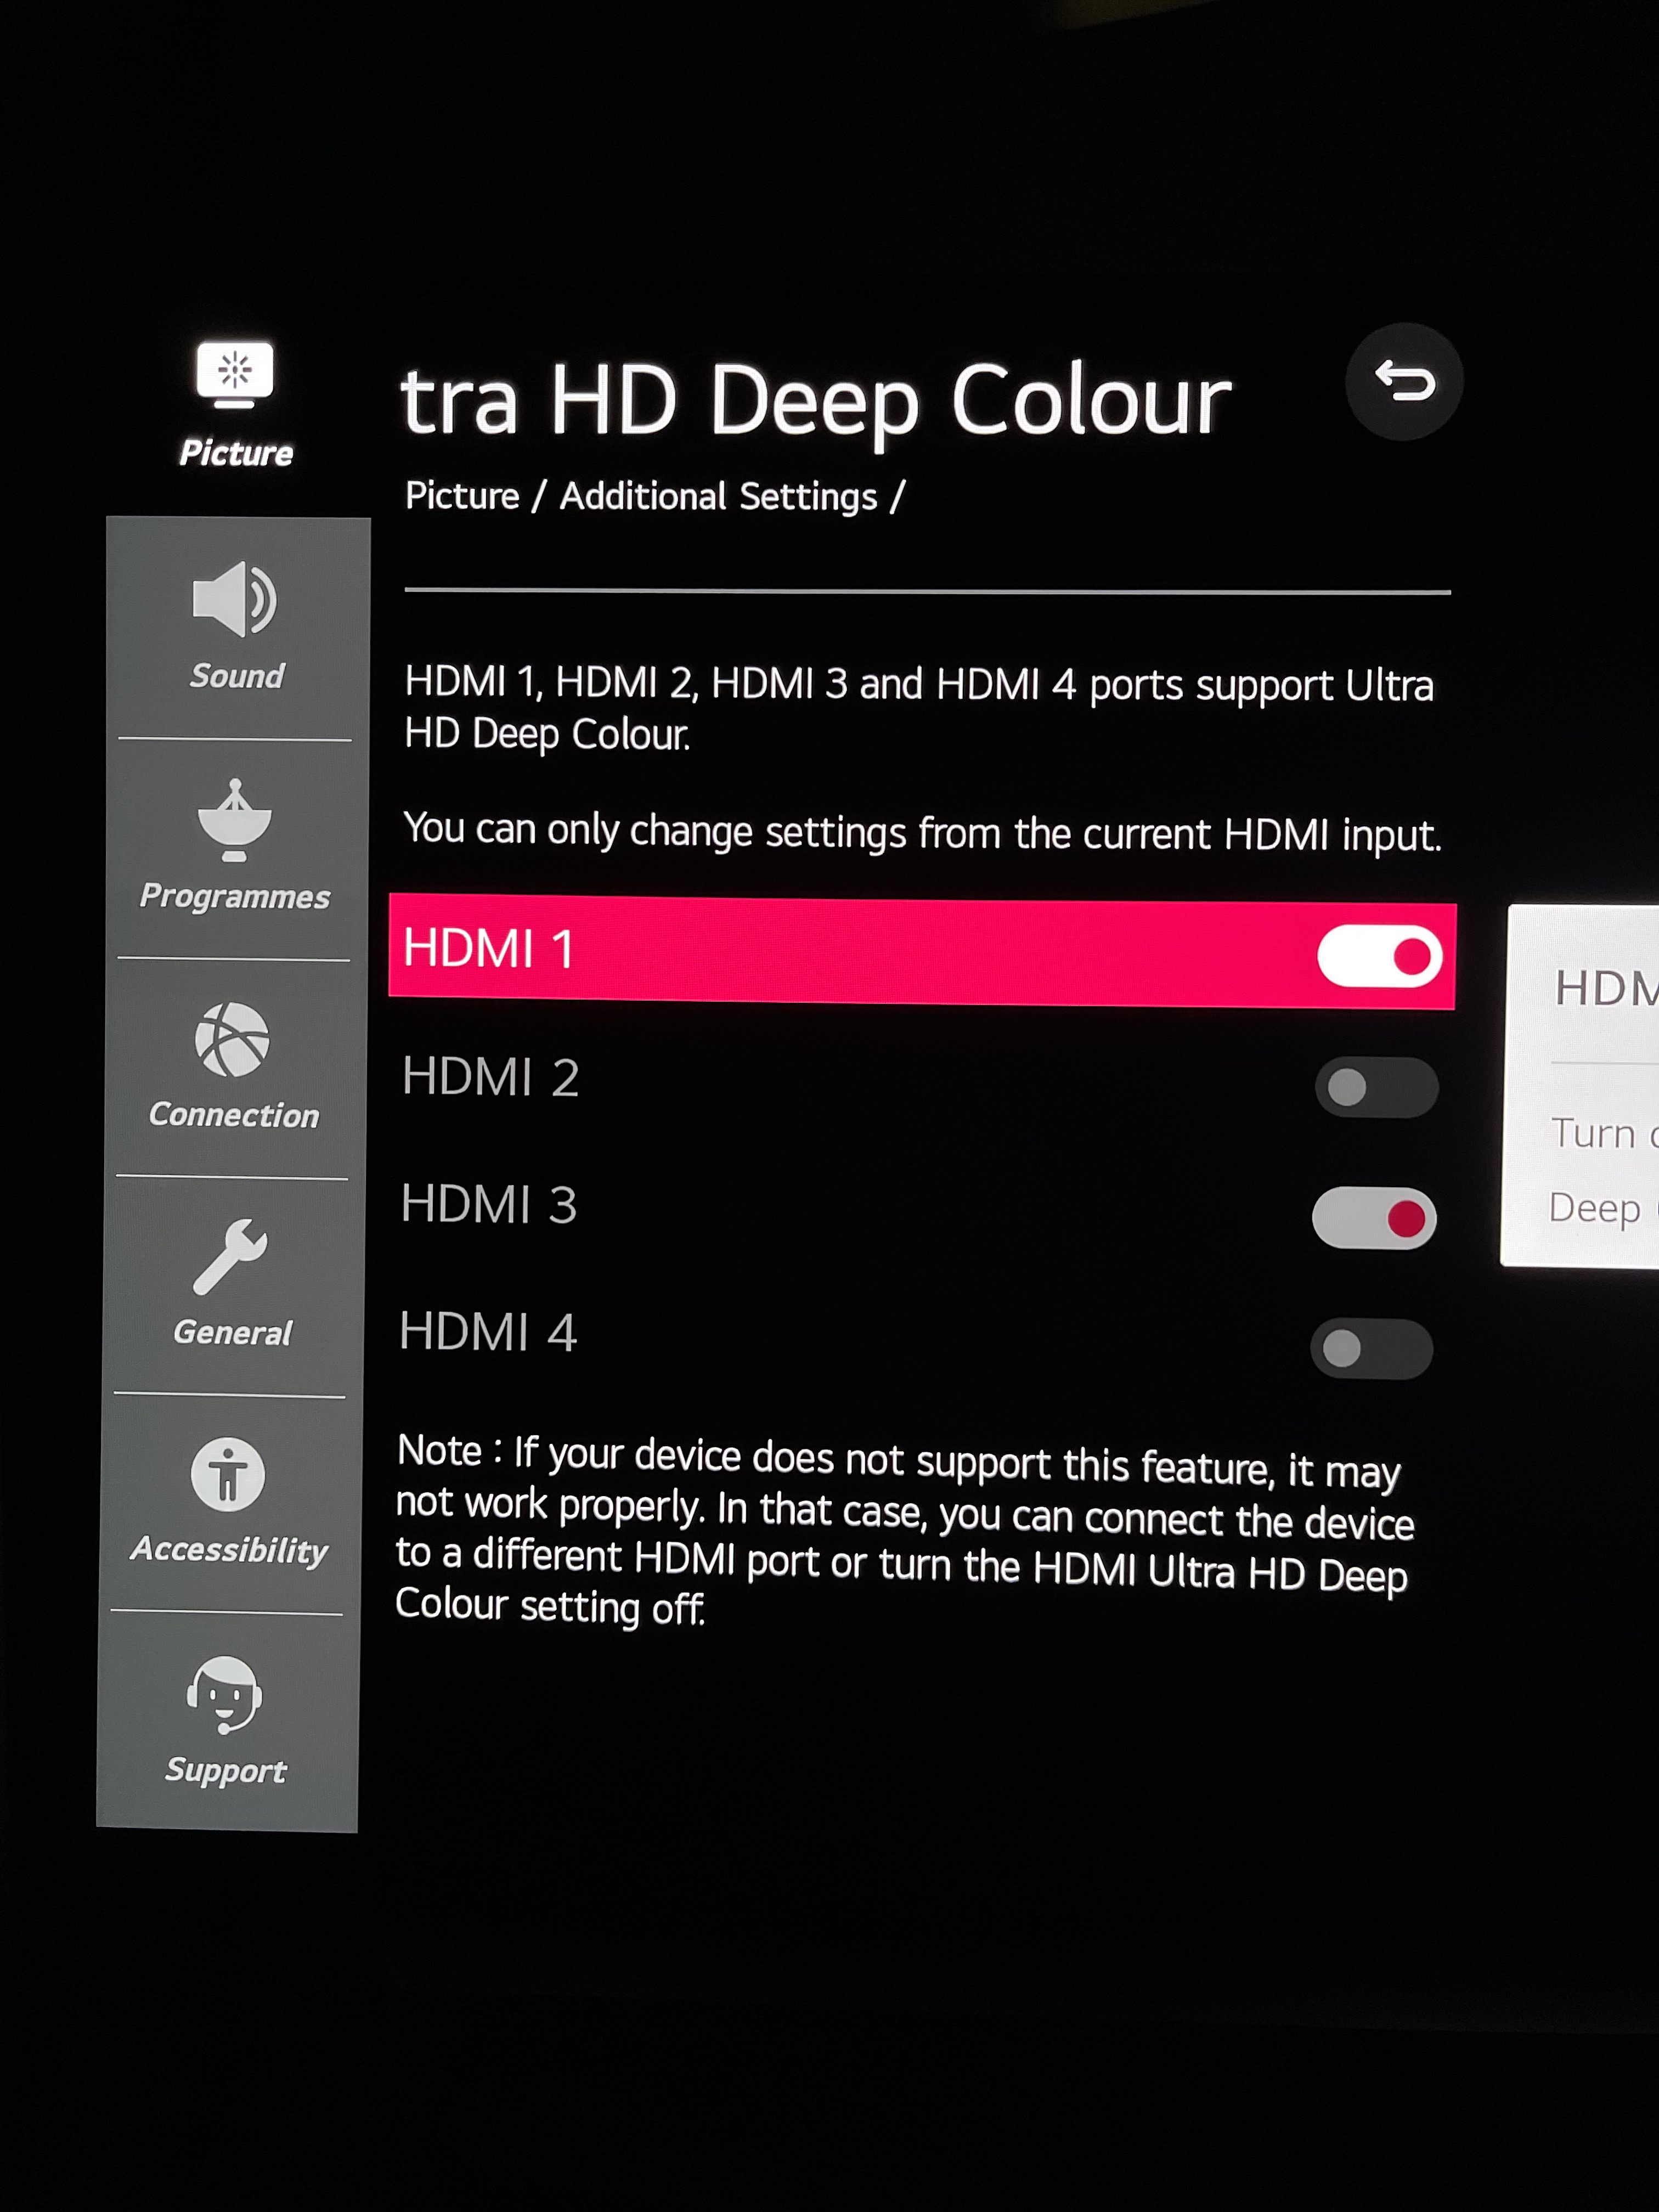
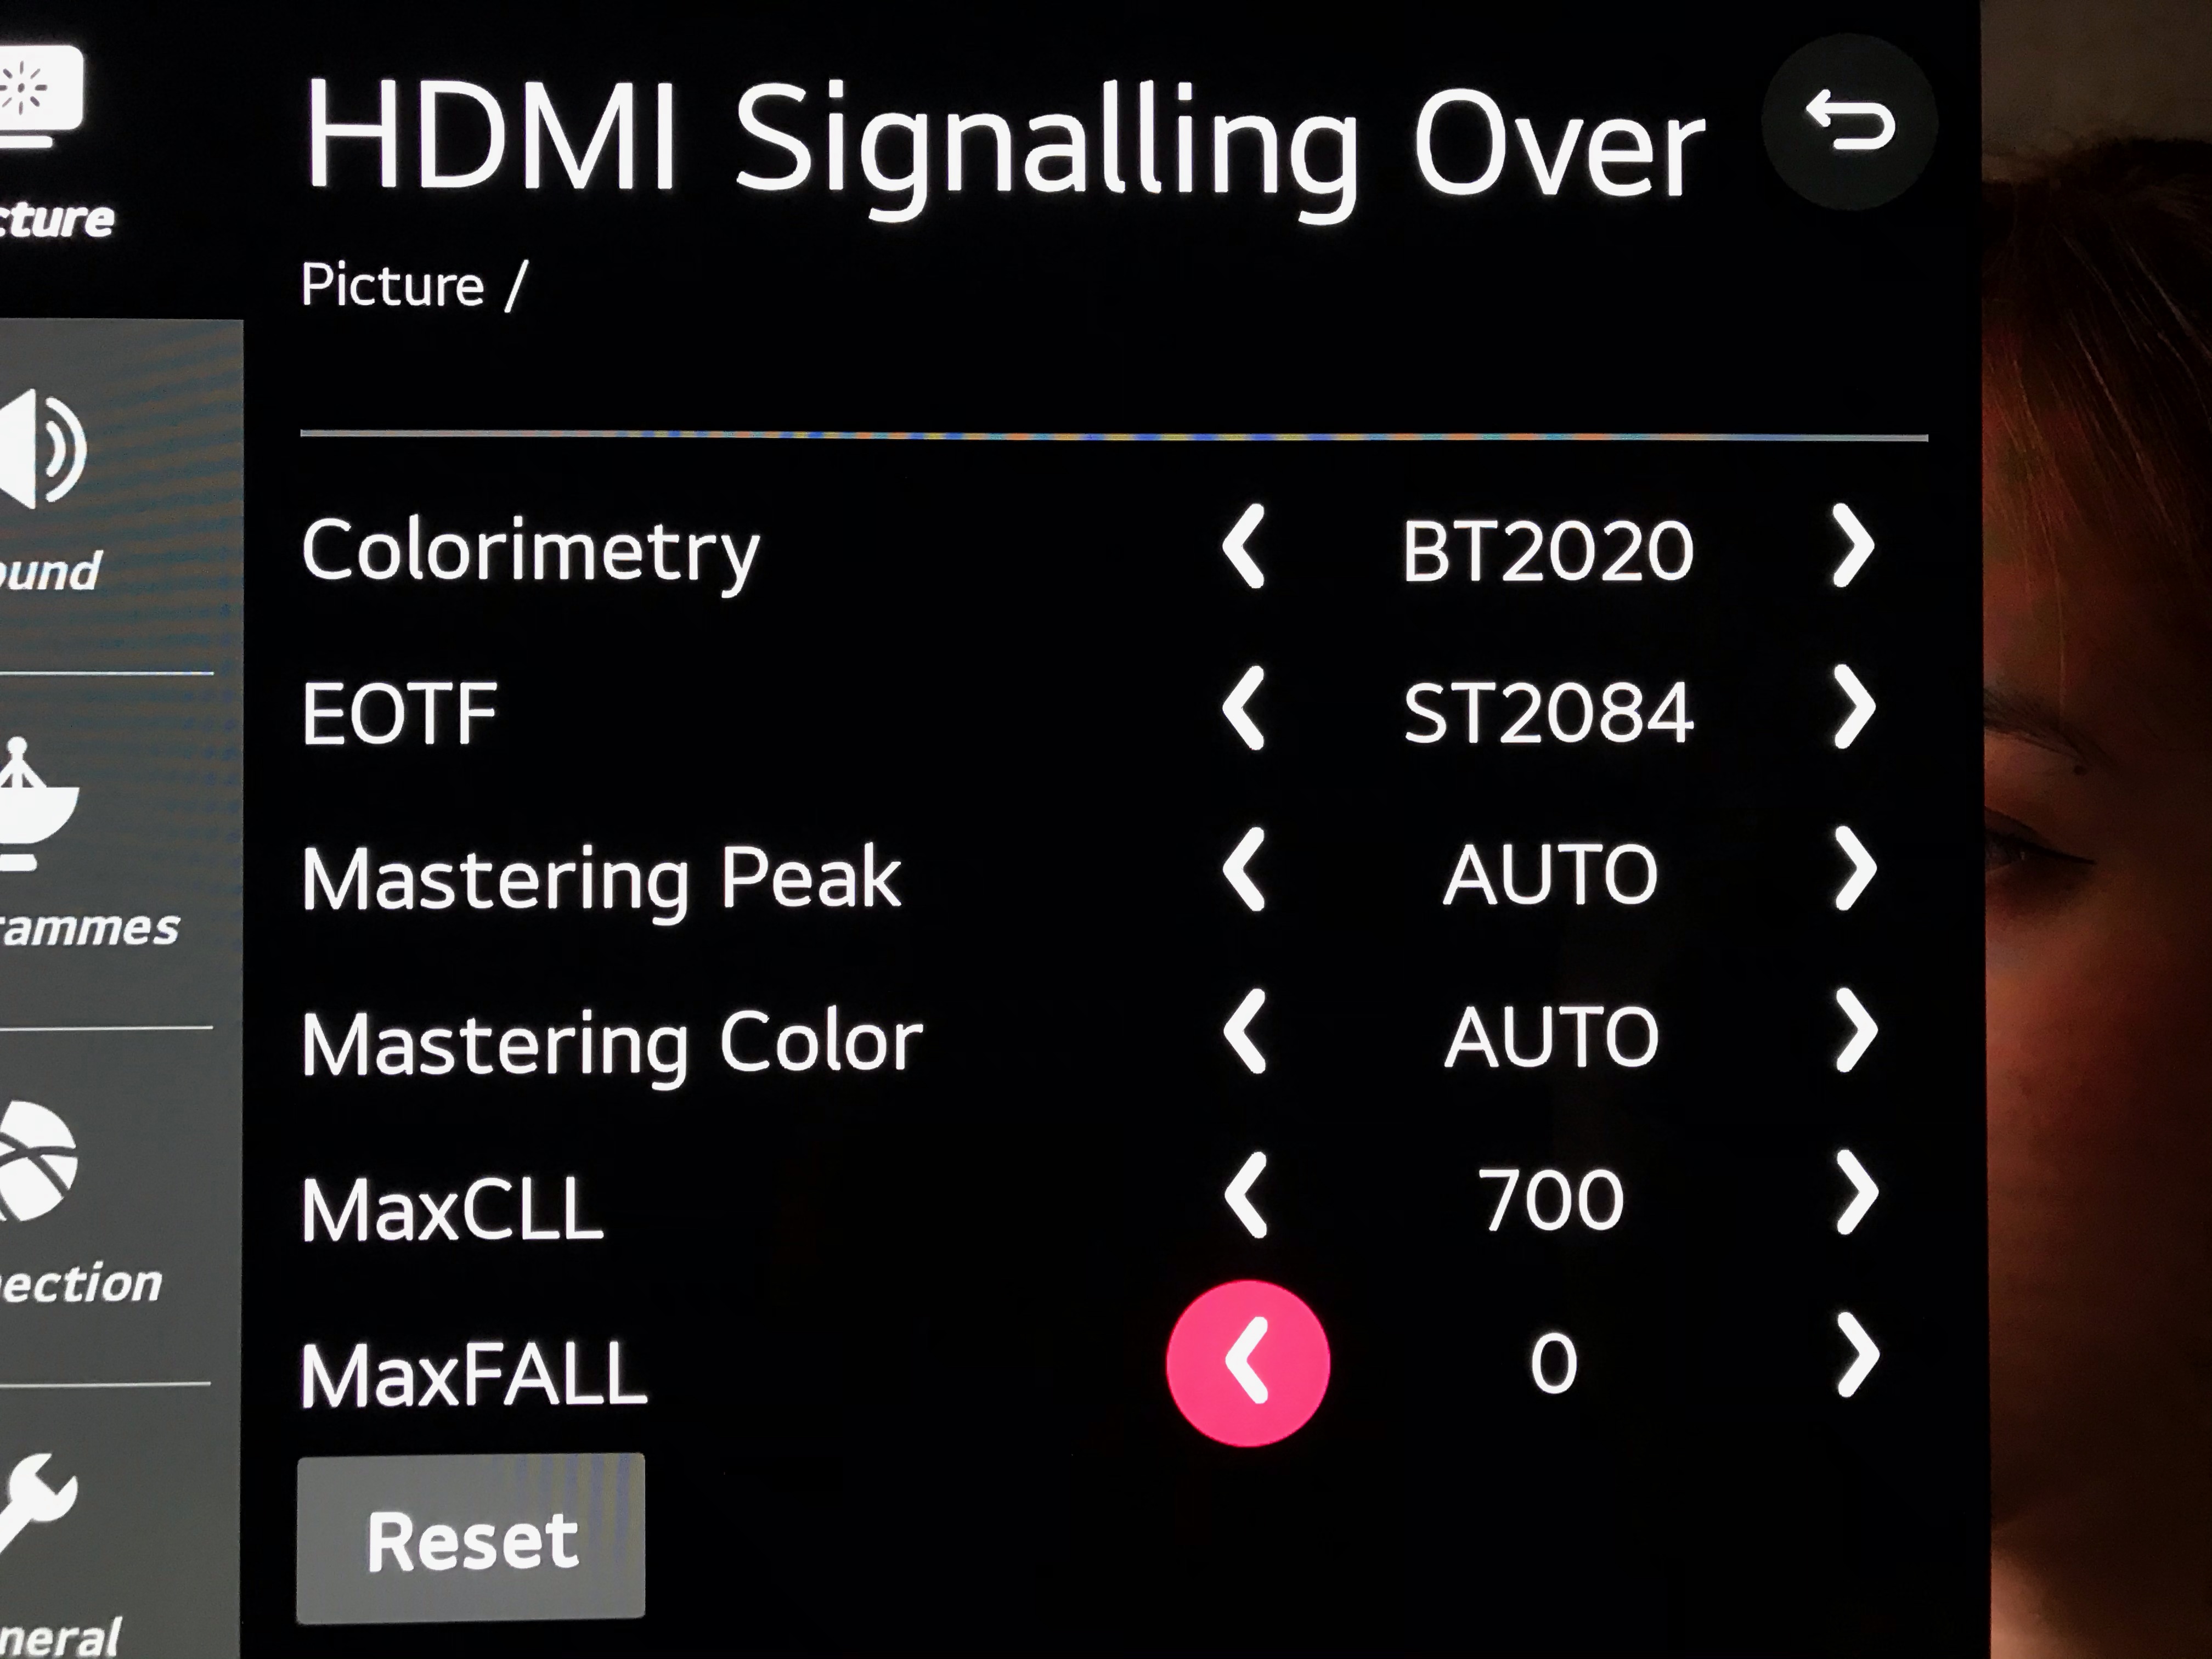
I have LG 65CX OLED. Used the code 1113111 to set the HDMI Signal override as you explained.
Although I am using Resolve 17. But all the concepts you shared above, applies there as well.
Glad you found it useful, Rajesh!
Jon, OLED burning is a problem that can happen only in HDR or also in SDR?
From what I understand, it can happen when bright static parts are displayed as the texts of software.
But, I don’t understand how burning can happen in your type of process since you only display the video on the TV.
It’s almost always moving, isn’t it? Or burning can happen in some minutes?!
If not, why do you use the TV only at the end of the process?
Sorry, I’m no burn-in expert! ☺️
Did you have the opportunity to validate the process with Resolve (with your computer + the Blackmagic 4K Ultra Studio mini + the TV)?
I’ve still got absolutely no idea how to set up Resolve for HDR.
Ok Jon.
Hi Jon, how are you?
Your articles are great! I am starting to study HDR and they are helping me a lot.
Would you know how to teach me how to make Davinci Resolve 17 display HDR on the reference monitor? I have an LG OLED B9 55 and I use an RTX 3060TI video card, which has HDMI 2.1. Windows is already playing HDR, but davinci’s player does not display.
I’m glad I could be of help! Here are the project settings for DaVinci Resolve 17: https://daejeonchronicles.com/2021/03/02/comprehensive-workflow-sony-a7s-iii-s-log3-hdr-10-in-davinci-resolve-studio-17-part-i/. I’m not familiar with Windows machines, but if after setting up your project according to the workflow you still aren’t getting HDR over your LG, you might check out the Blackmagic forums: there are a lot of threads with users who experienced similar issues; hopefully you’ll find your solution there!